Client Credentials Flow via External Client App
This guide articulates the technical prerequisites to set up an integration between Zenity and Salesforce using a OAuth Client Credentials flow for authentication. Follow this link to see the official Salesforce documentation about this OAuth flow.
Step 1: Create a profile or permission set for Zenity scan
According to your organization procedures, you can either create a new profile or use an existing profile and create a new permission set.
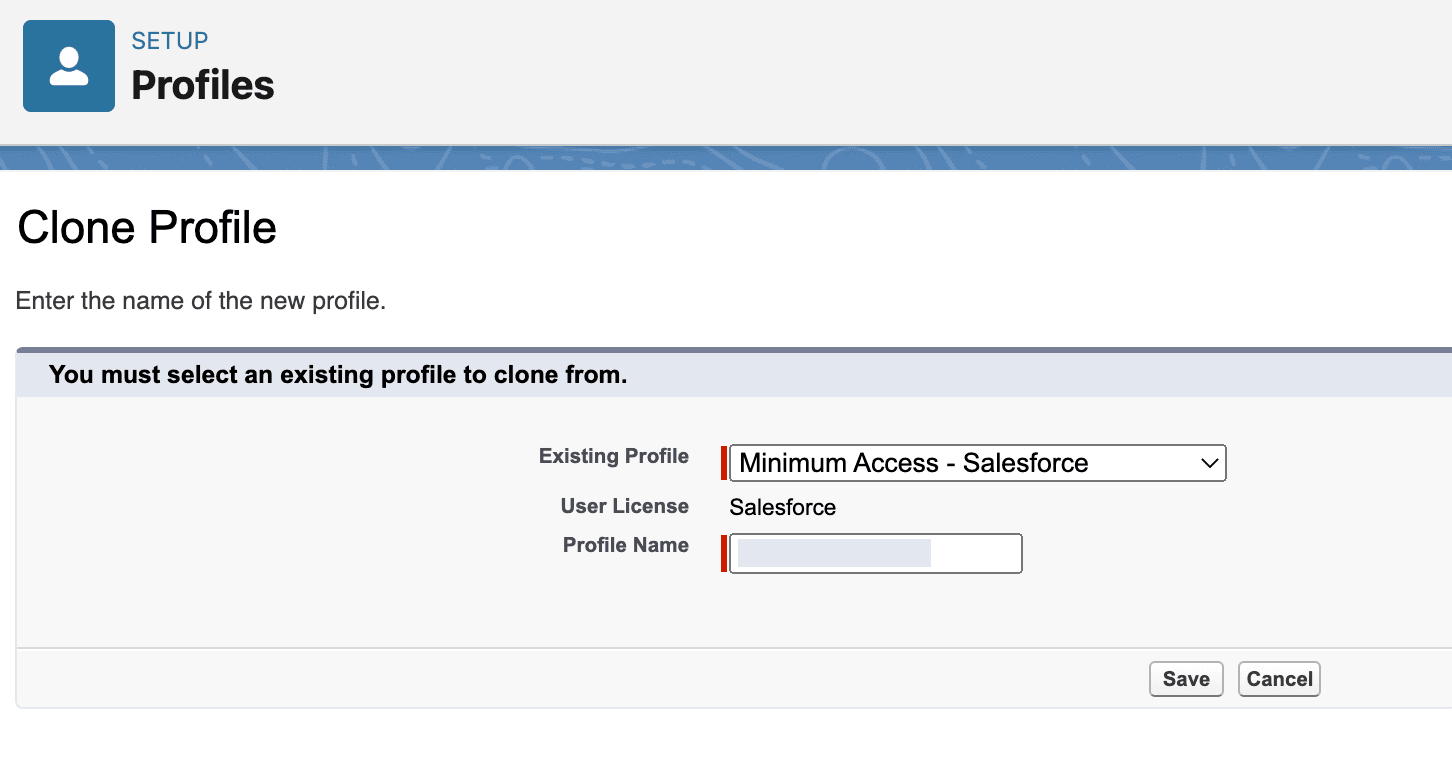
To create a new profile:
- Go to Salesforce organization setup > ADMINISTRATION > Users > Profiles.
- Click Create New Profile.
- In Existing Profile, choose Minimum Access - Salesforce, name the profile, and save.
To create a new permission set:
- Go to Salesforce organization setup > ADMINISTRATION > Users > Permission Sets.
- Click Create New.
- Name and label the permission set and save.

Whether you created a new profile or a new permission set, go to its overview page > System Permissions, click Edit, and enable the following permissions:
| Permission Name | Mandatory/Optional |
|---|---|
| API Enabled | Mandatory |
| View Setup and Configuration | Mandatory |
| View Roles and Role Hierarchy | Mandatory |
| Modify Metadata Through Metadata API Functions | Mandatory |
| Create and Set Up Experiences | Mandatory |
| Manage Connected Apps | Mandatory |
| Customize Application | Mandatory |
| Manage Custom Permissions | Mandatory |
| Download AppExchange Packages | Optional |
Security note: We also recommend enabling the permission Api Only User. This disallows the user intended for background integration with Zenity from logging into the Salesforce UI.
Step 2: Create a user for Zenity scan
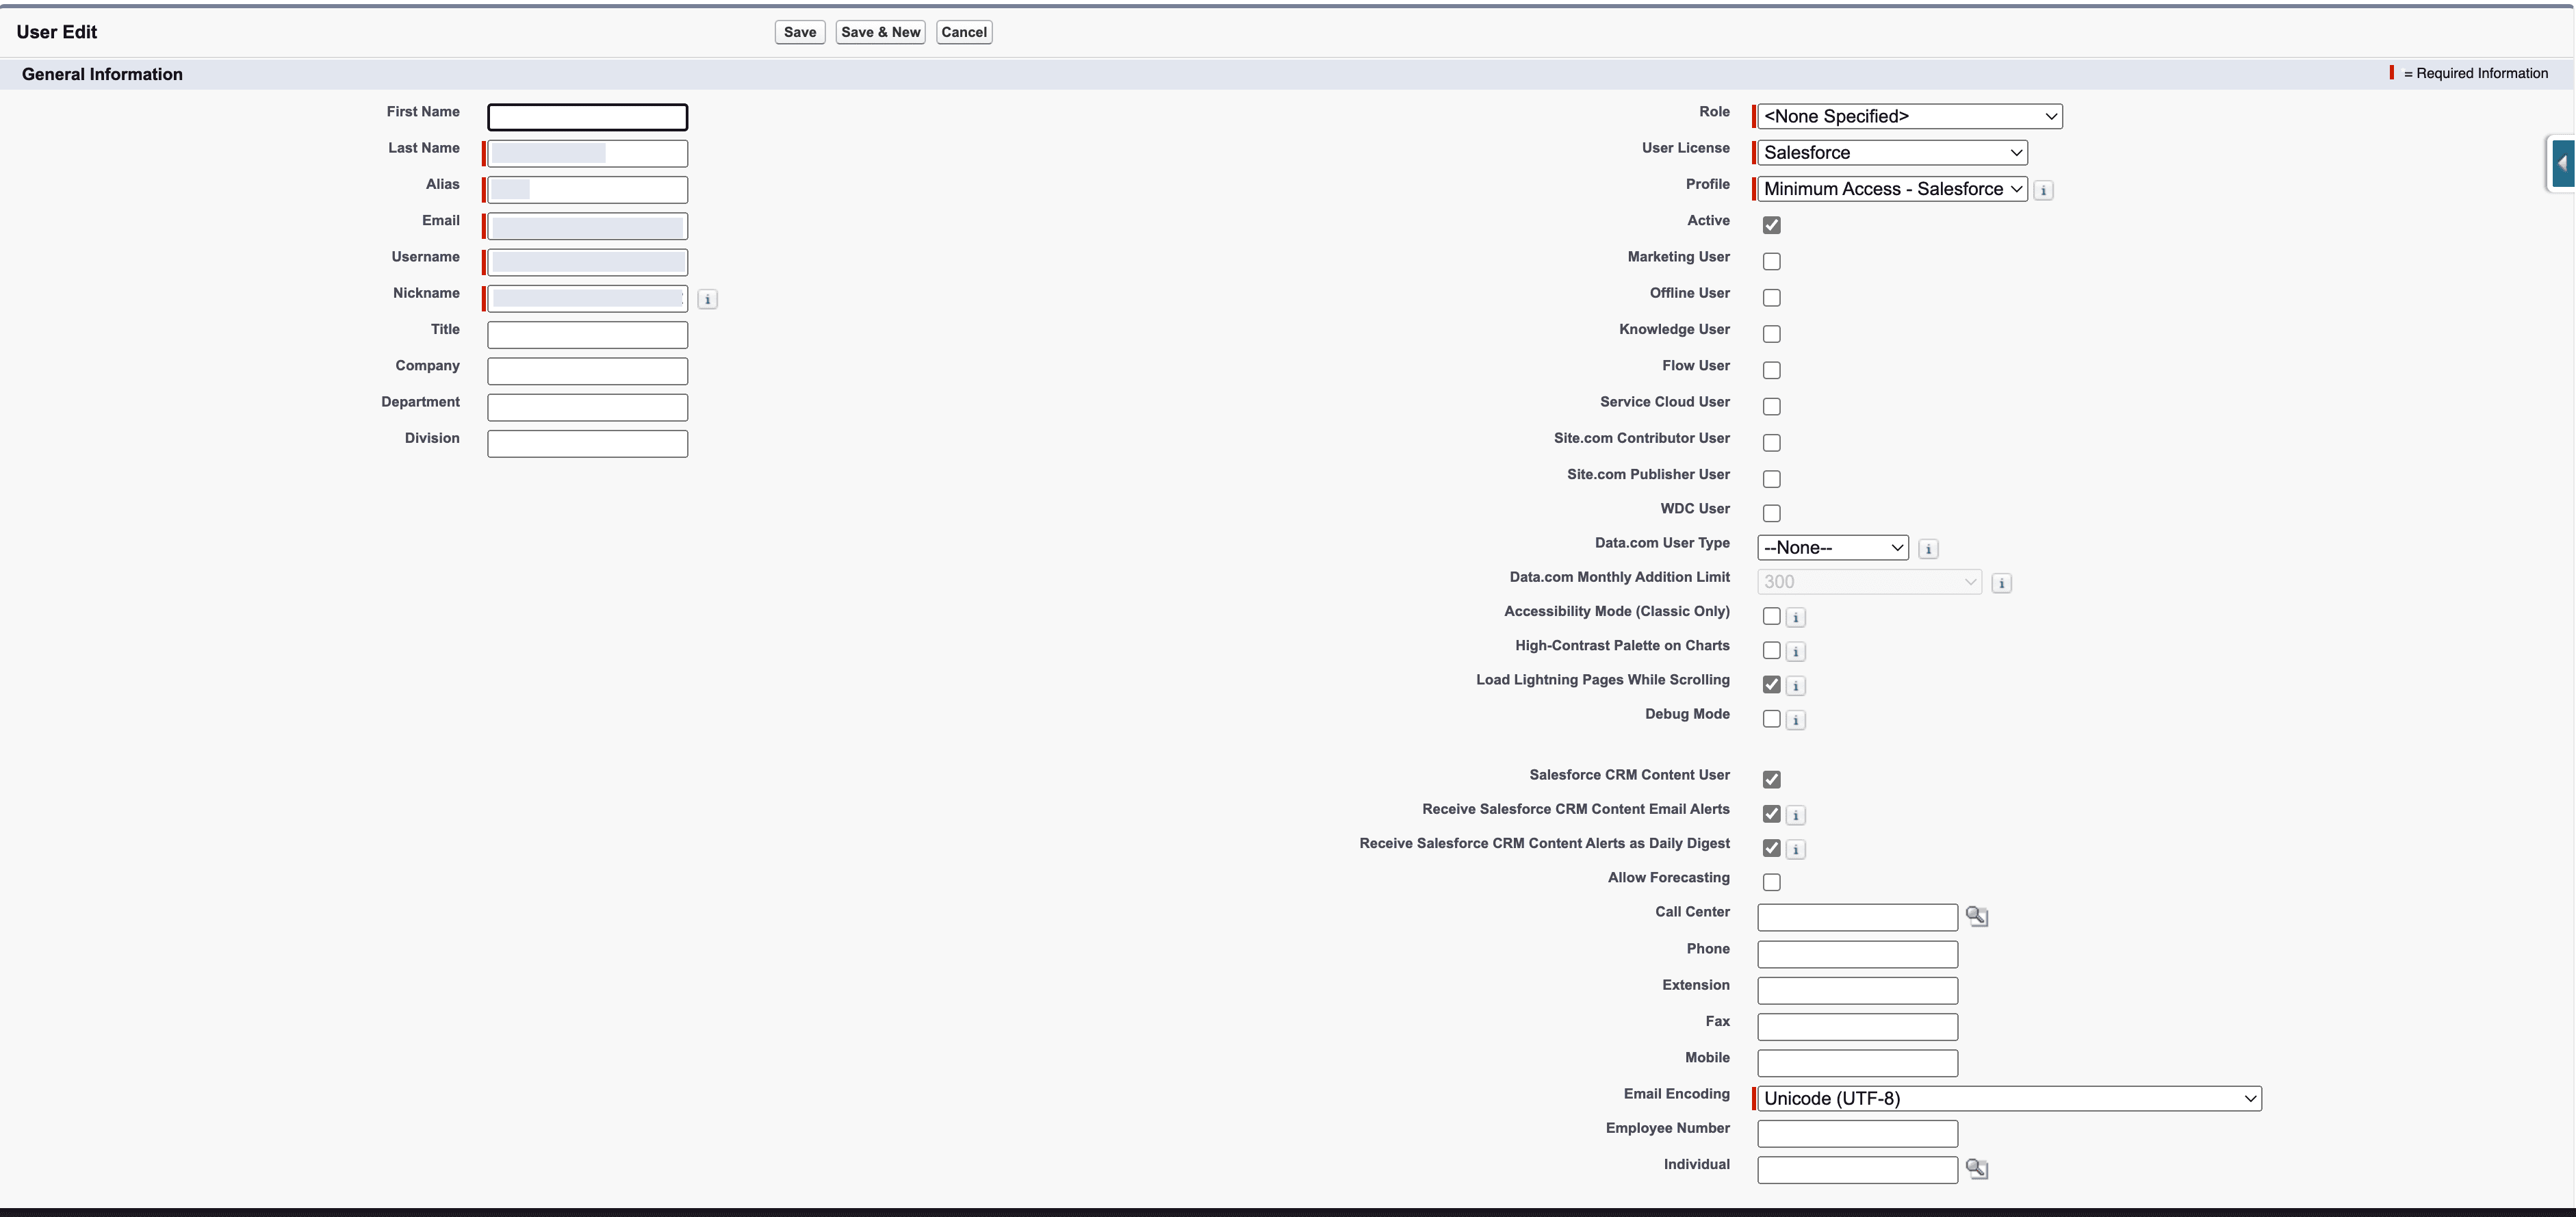
- Go to Salesforce organization setup > ADMINISTRATION > Users > Users.
- Click Create New User.
- Fill in required fields.
- Assign Salesforce User License.
- If you created a profile in Step 1, assign it; otherwise, assign the Minimum Access - Salesforce profile.
- Save.
- If you created a permission set in Step 1, go to the new user’s overview page > Permissions Set Assignments > Edit Assignments and assign the permission set you created.
Step 3: Create and configure the External Client App
- Go to Setup > Apps > External Client App Manager.
- Click New External Client App.
- In Basic Information:
- External Client App Name:
zenity_integration - API Name:
zenity_integration - Distribution State: Local
- External Client App Name:
- In API (Enable OAuth Settings):
- Enable OAuth.
- Set callback URL to
https://localhost/(required field but not used by this flow). - Select OAuth scopes:
Manage user data via APIs (api)Perform requests at any time (refresh_token, offline_access)Perform ANSI SQL queries on Data Cloud data (cdp_query_api)
- In Flow Enablement & Security:
- Enable Refresh Token Rotation.
- Check:
- Require secret for Web Server Flow
- Require secret for Refresh Token Flow
- Require Proof Key for Code Exchange (PKCE) extension for supported authorization flows
- Click Create.
Step 4: Set execution user and policies
- In the app details page, open Policies and click Edit.
- Under App Authorization:
- Refresh Token Policy: Refresh token is valid until revoked.
- IP Relaxation: Enforce IP restrictions.
- Under Client Credentials Flow, assign the user created in Step 2 in the Run As field.
- Click Save.
Step 5: Create the integration in Zenity portal
-
Sign into Zenity portal, go to Integrations page, click Add integration and provide the following:
- The Salesforce instance url of your organization. Go to Salesforce organization setup > SETTINGS > Company Settings > My Domain and use the value of Current My Domain URL field under My Domain Details section in the following template: https://{mydomain-url}
- The Client id and Client Secret of the connected app you created on step 3 (also referred as Consumer Key and Consumer Secret). In order to find it:
- Go to Salesforce organization setup > PLATFORM TOOLS > Apps > App Manager > Click on the drop down in the row of the app you created in step 3
- Find it in Consumer Key and Secret Under the API (Enable OAuth Settings) section (you might be required to authenticate to Salesforce again in this step)
-
Salesforce instance URL: Go to Salesforce organization setup > SETTINGS > Company Settings > My Domain and use Current My Domain URL as
https://{mydomain-url}. -
Client ID and Client Secret (Consumer Key and Consumer Secret):
- Go to Salesforce organization setup > Apps > External Client App Manager.
- Open the app from Step 3.
- Go to Settings > OAuth Settings.
- Under App Settings, open Consumer Key and Secret.
IPs whitelisting consideration
See here